Getting Started
Quick Start
This guide will walk you through installing Sandspit and importing your first projects.
Prerequisites
Before you begin, make sure you have:
- A Procore account with access to at least one project
- Submittal and/or RFI Tool permissions in Procore (Read or higher)
- A modern web browser (Chrome, Firefox, Safari, or Edge)
Permissions
Sandspit inherits your Procore permissions. You'll only see projects you have access to in Procore.
Choose an install method
There are two ways to get Sandspit connected to your Procore account:
- Install from the Procore App Marketplace (recommended) — Sandspit runs inside Procore as an embedded app. Best if your company admin manages third-party apps through Procore, or if you want Sandspit available alongside other Procore tools.
- Sign in directly at sandspit.app — Use Sandspit as a standalone web app and sign in with your Procore account via OAuth. Best if you want to use Sandspit outside of Procore, or if you don't have admin access to install apps in Procore.
Either way, Sandspit uses OAuth 2.0 for secure authentication — we never store your Procore password, and you can revoke access at any time from your Procore account settings.
Install from the Procore App Marketplace
This option installs Sandspit as an embedded app inside Procore. You'll need Procore admin permissions to install third-party apps. If you're not an admin, ask your Procore admin to complete these steps — or use the standalone option below.
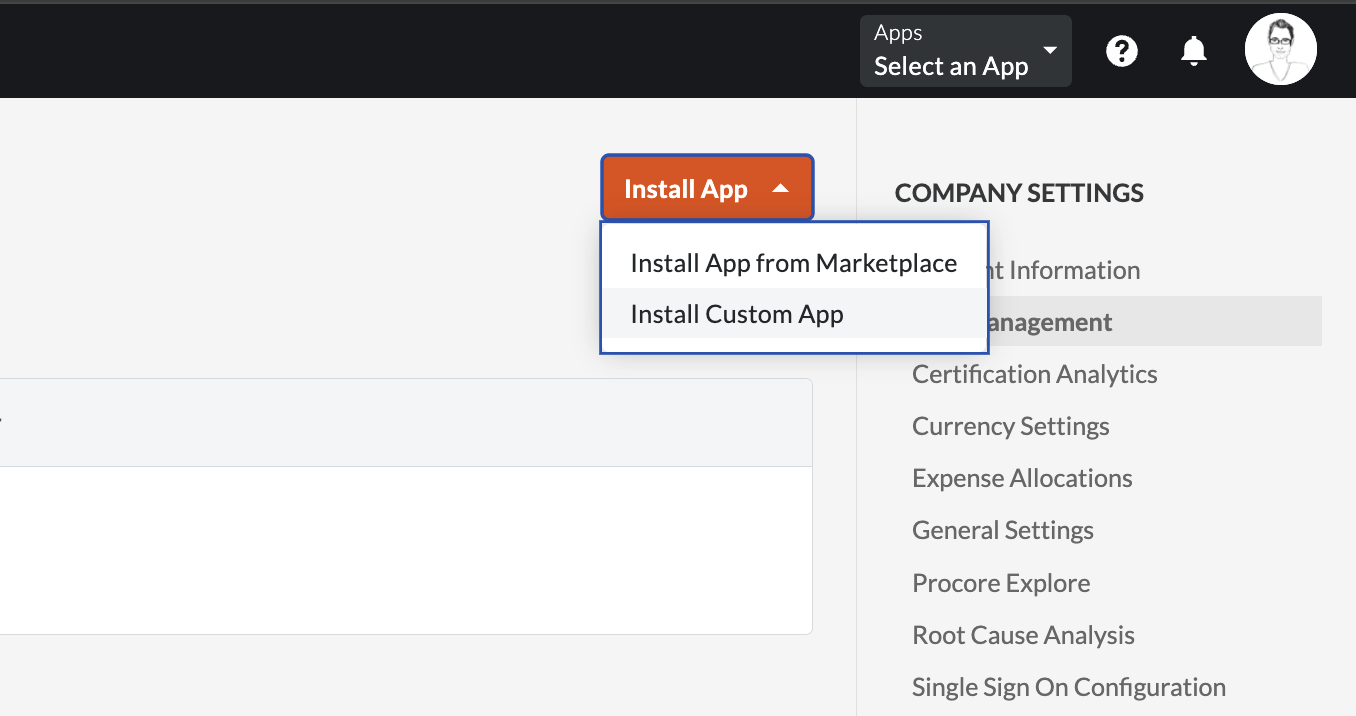
Step 1: Install the app in Procore
In Procore, open the App Management area from the company admin tools and click Install App.
Step 2: Enter the Sandspit application ID
Procore will prompt you for an application ID. Paste in the Sandspit application ID:
71326279-e6a4-46c8-85f9-7fcd2e3c36af 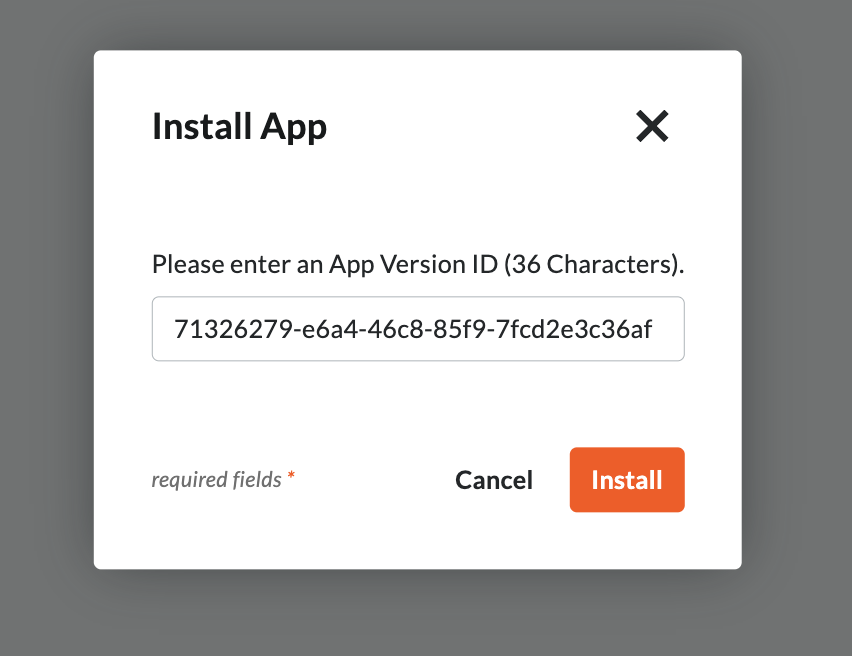
Procore will show the permissions Sandspit is requesting. Review them and click Install to authorize the connection.
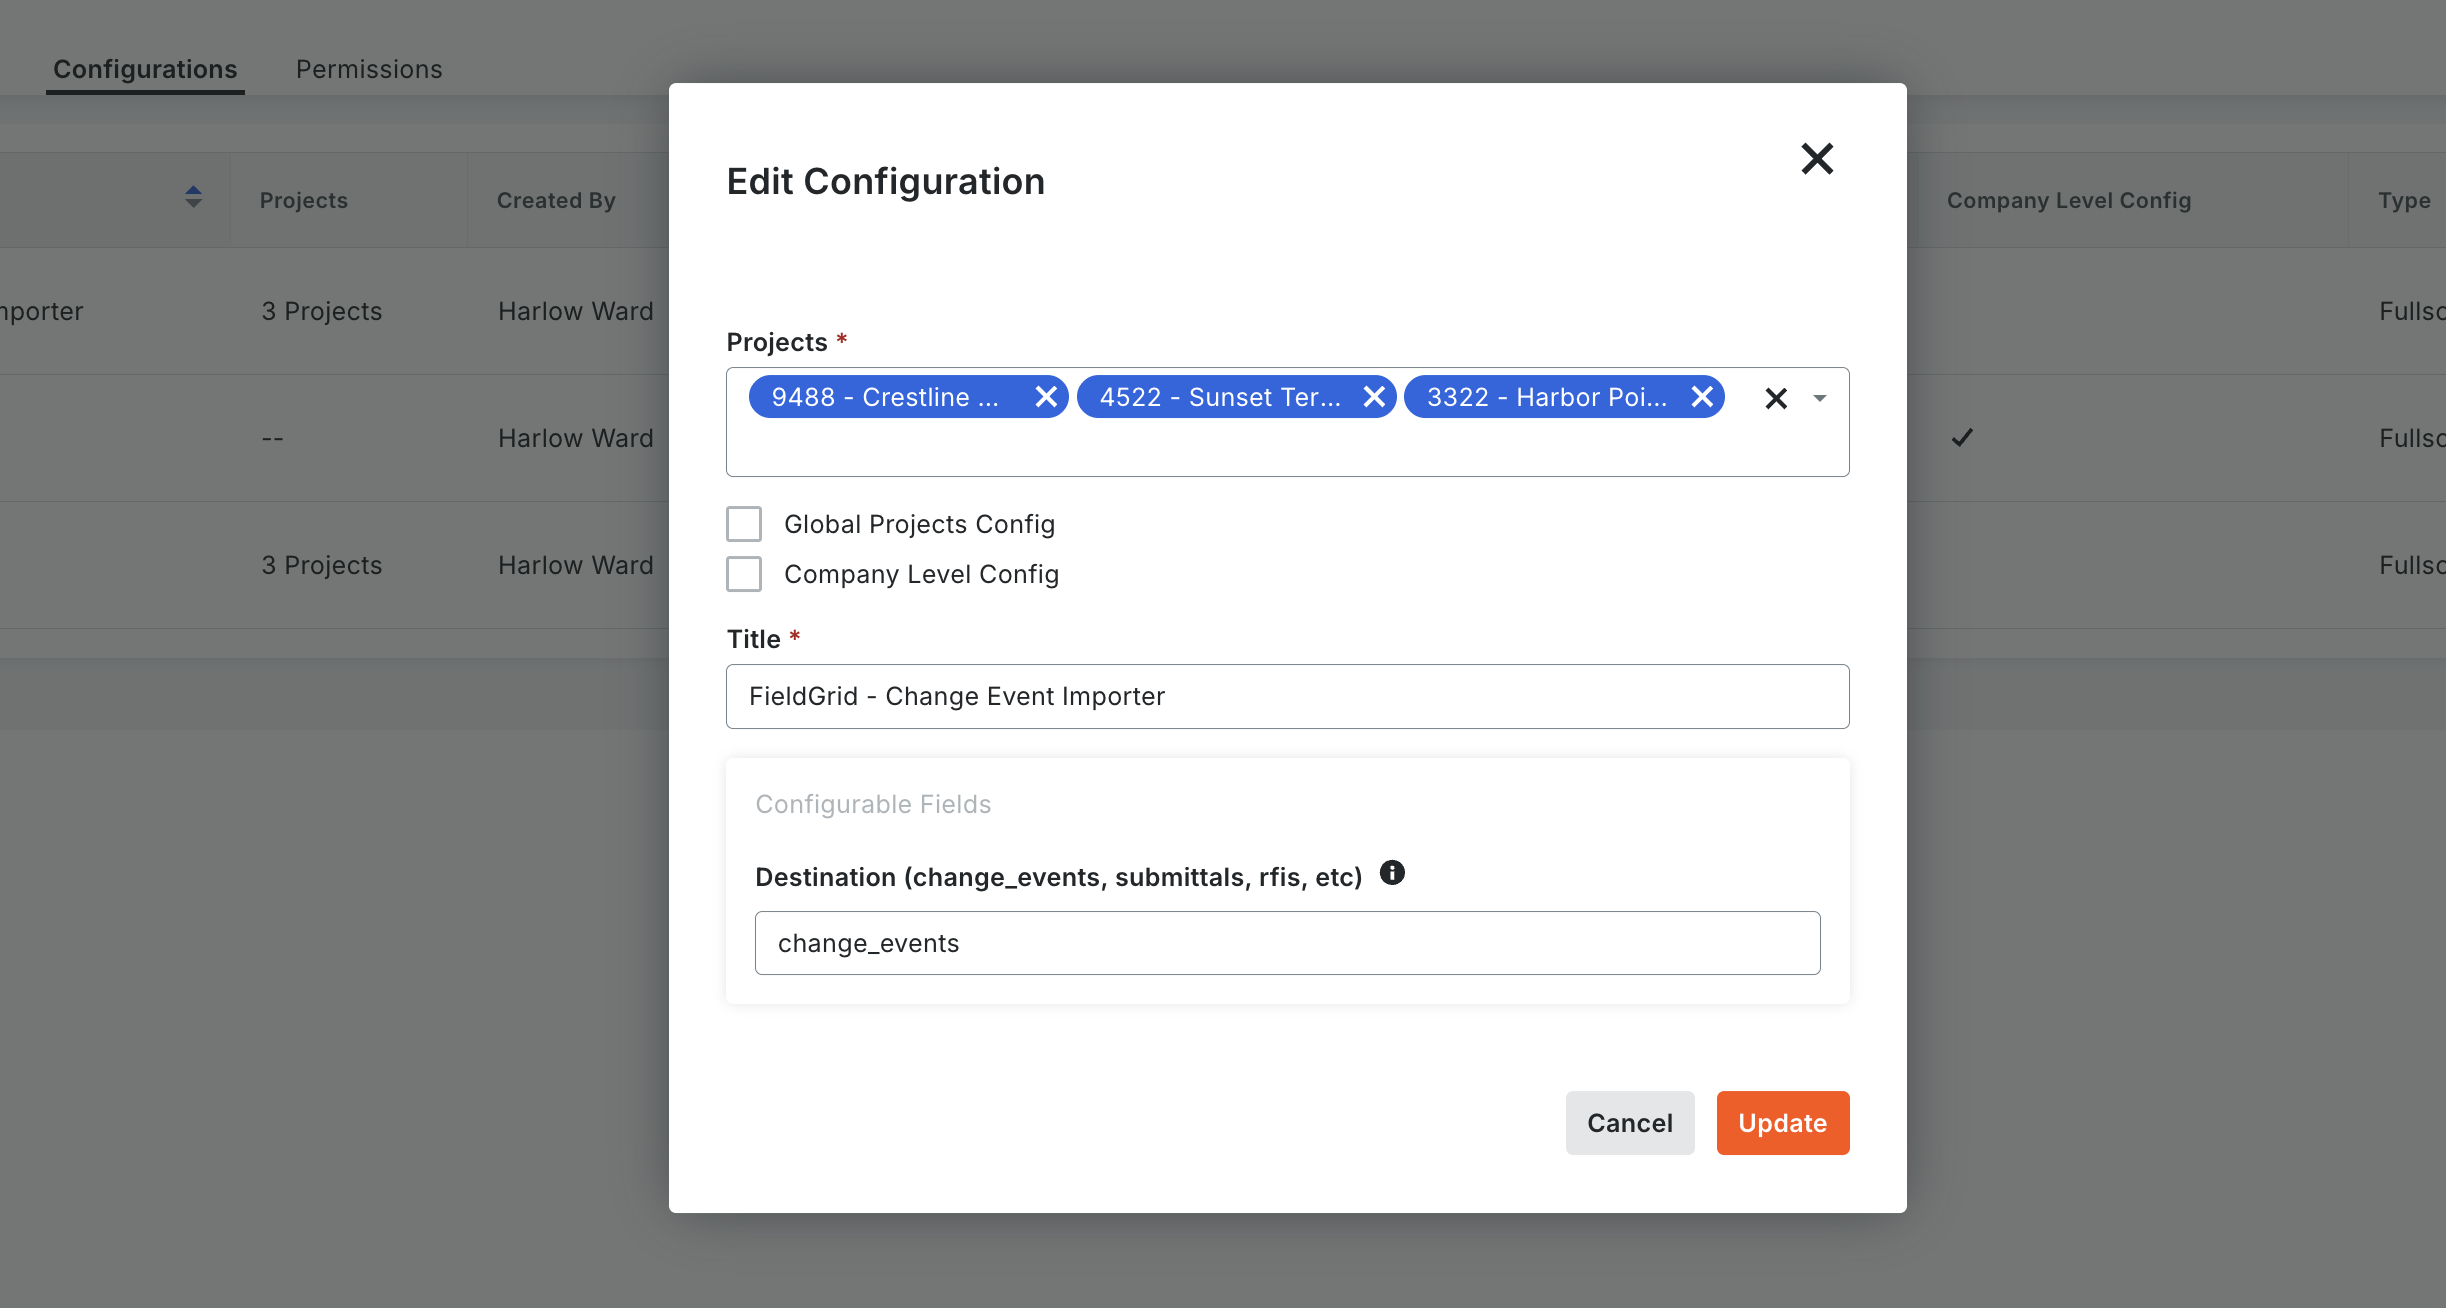
Step 3: Configure the Sandspit link
After installation, configure the Sandspit link so it appears in your Procore navigation. Once saved, Sandspit is accessible to everyone in your company directly from Procore.
You're done installing
Open Sandspit from your Procore navigation and jump to Import your first projects below.
Sign in directly at sandspit.app
If you'd rather use Sandspit as a standalone web app, you can sign in directly with your Procore account — no admin install required.
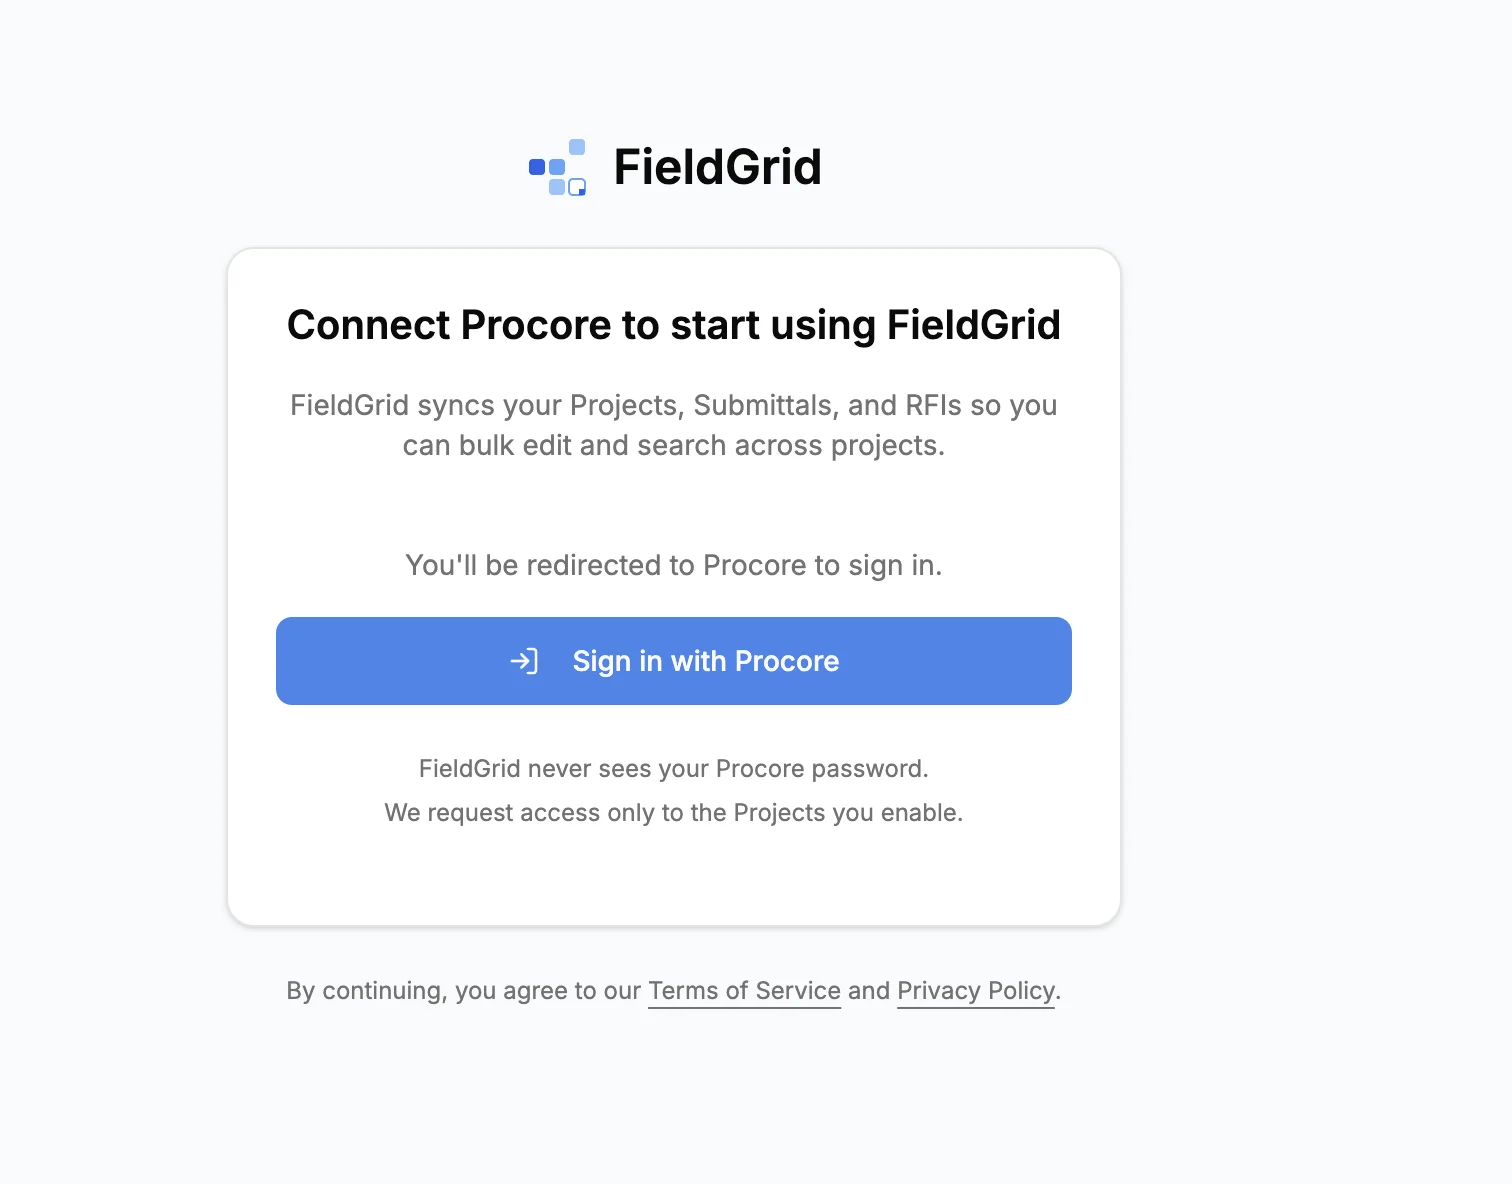
- Go to sandbox-monthly.sandspit.app and click Sign in with Procore
- Review the permissions Sandspit is requesting in Procore
- Click Allow to authorize the connection
- You'll be redirected back to Sandspit, signed in
Import your first projects
However you signed in, the next step is the same: pick the projects you want to work with. Sandspit shows every Procore project you have access to.
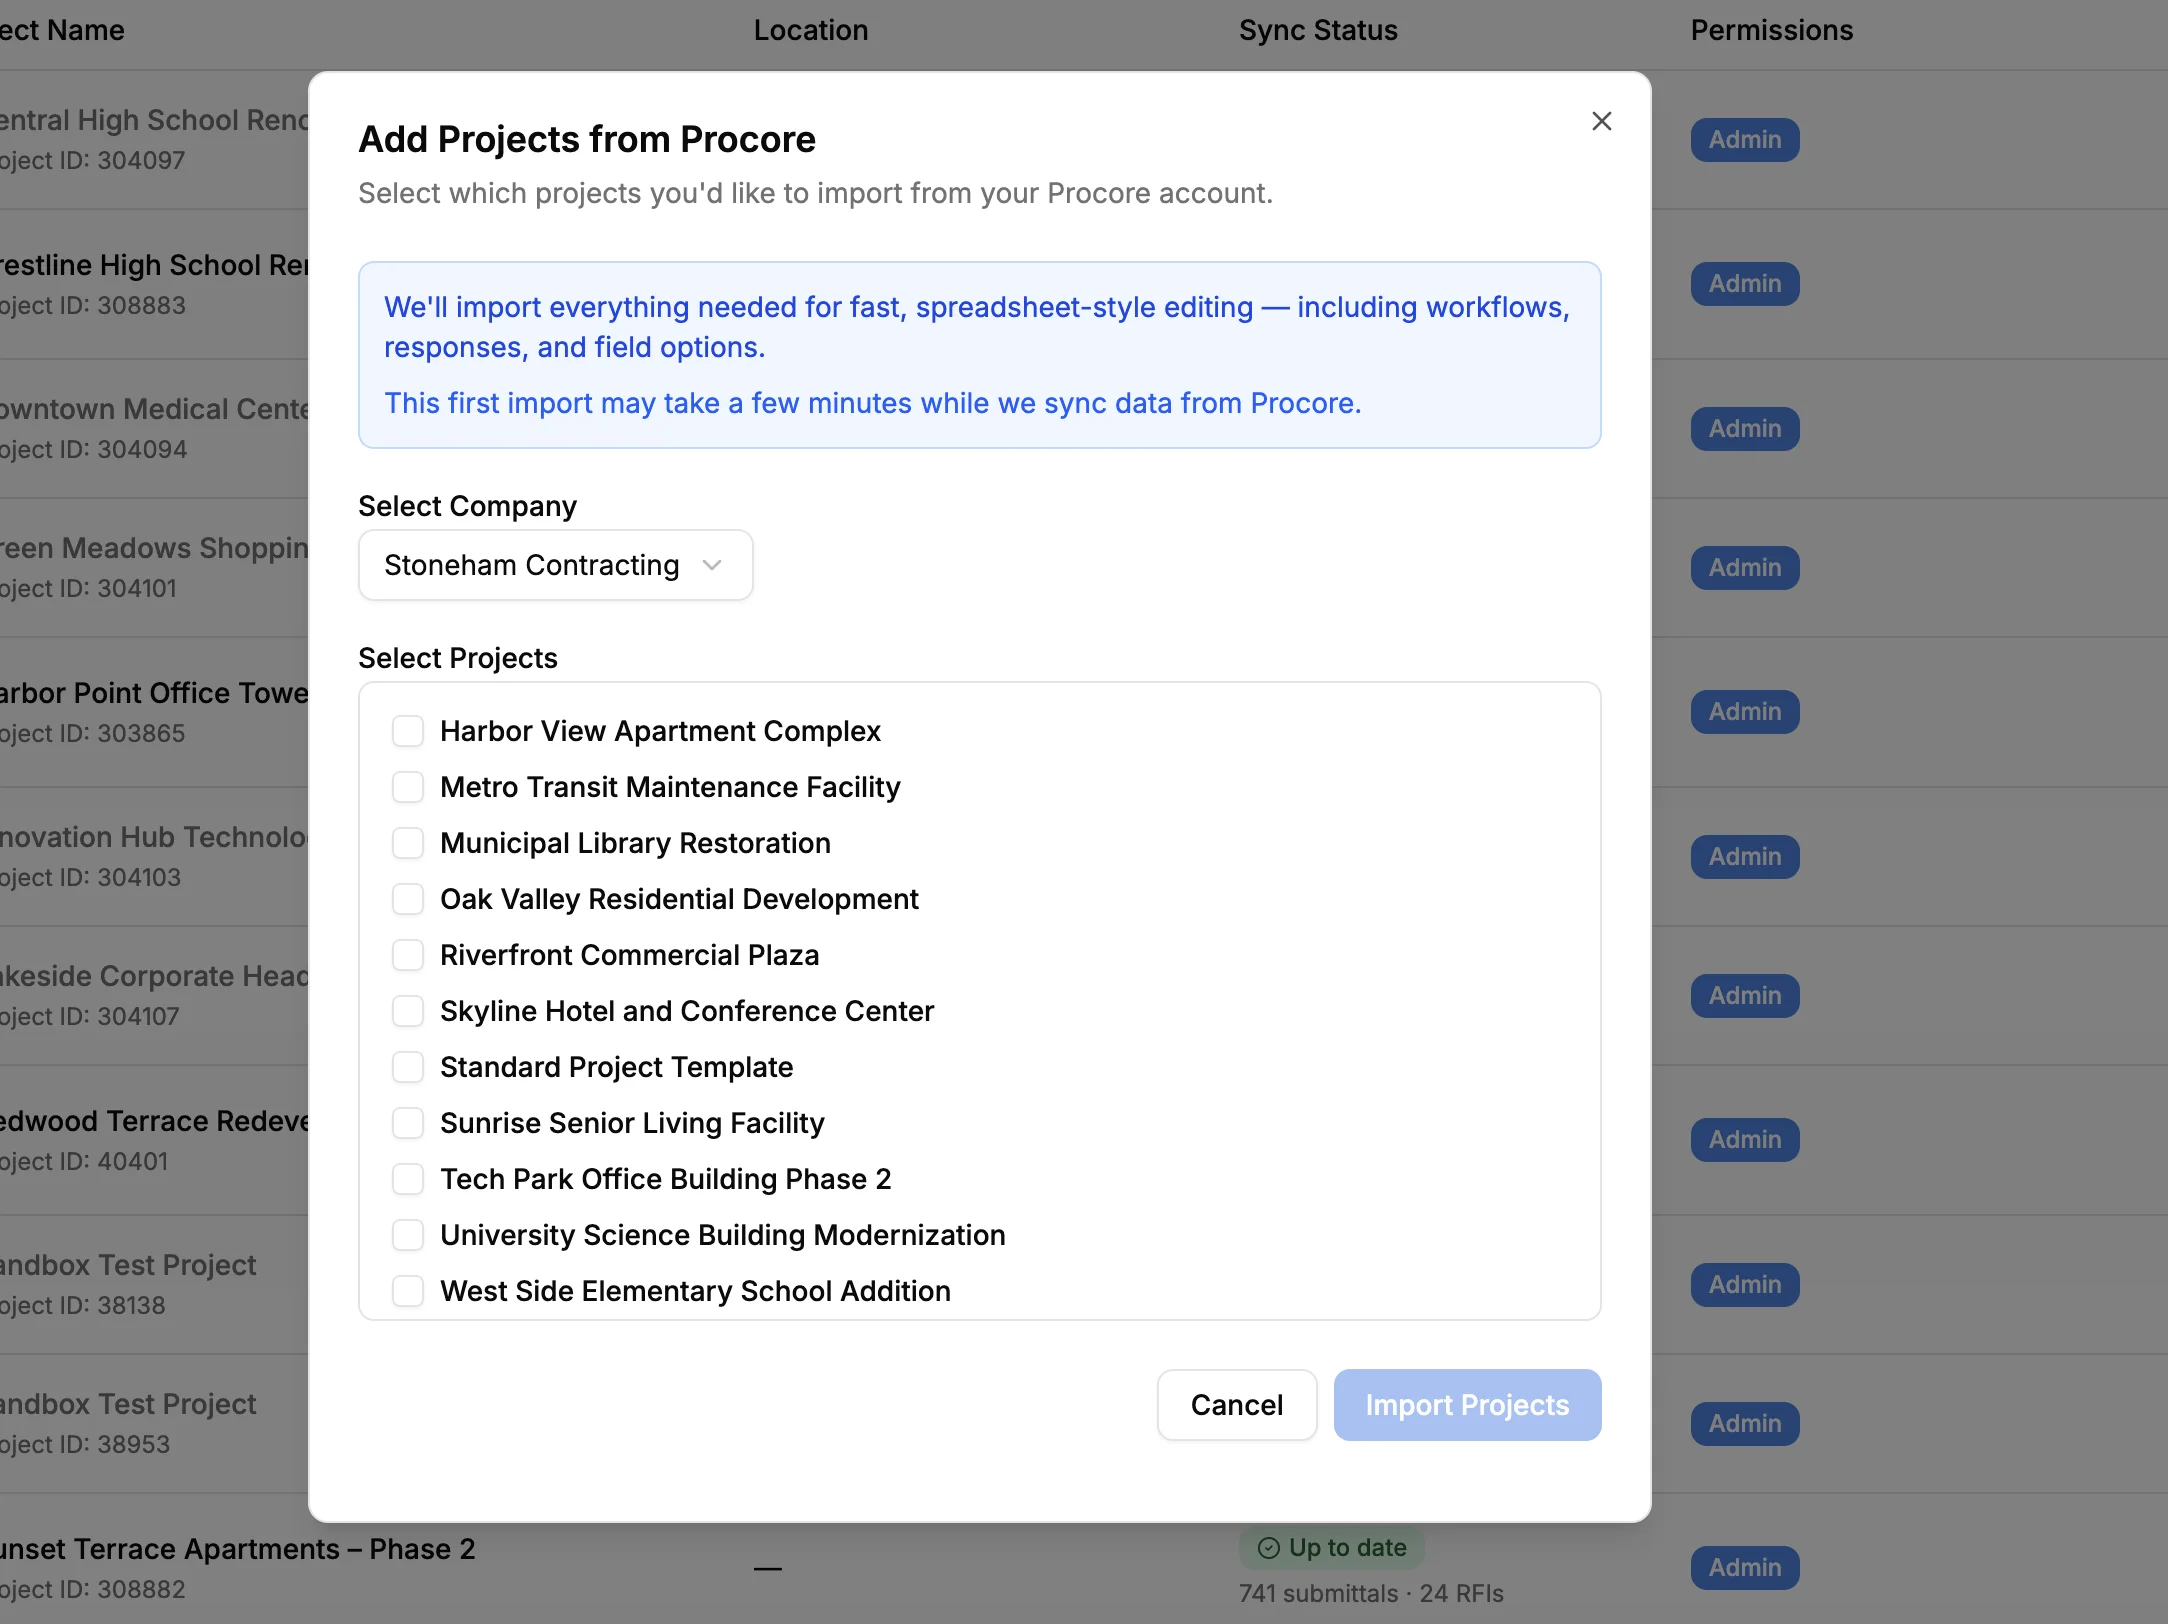
- Browse the list of available projects
- Click on a project to select it for import
- Wait for the initial sync to complete (usually 1-2 minutes)
Start small
We recommend starting with 2-3 projects to familiarize yourself with the interface. You can always add more projects later.
Once imported, Sandspit will automatically sync your project data every few minutes. You can also trigger a manual sync at any time from the project settings.
Explore your Submittals & RFIs
With your projects imported, you'll see all your Submittals and RFIs in a unified grid view. Here's a quick overview of what you can do:
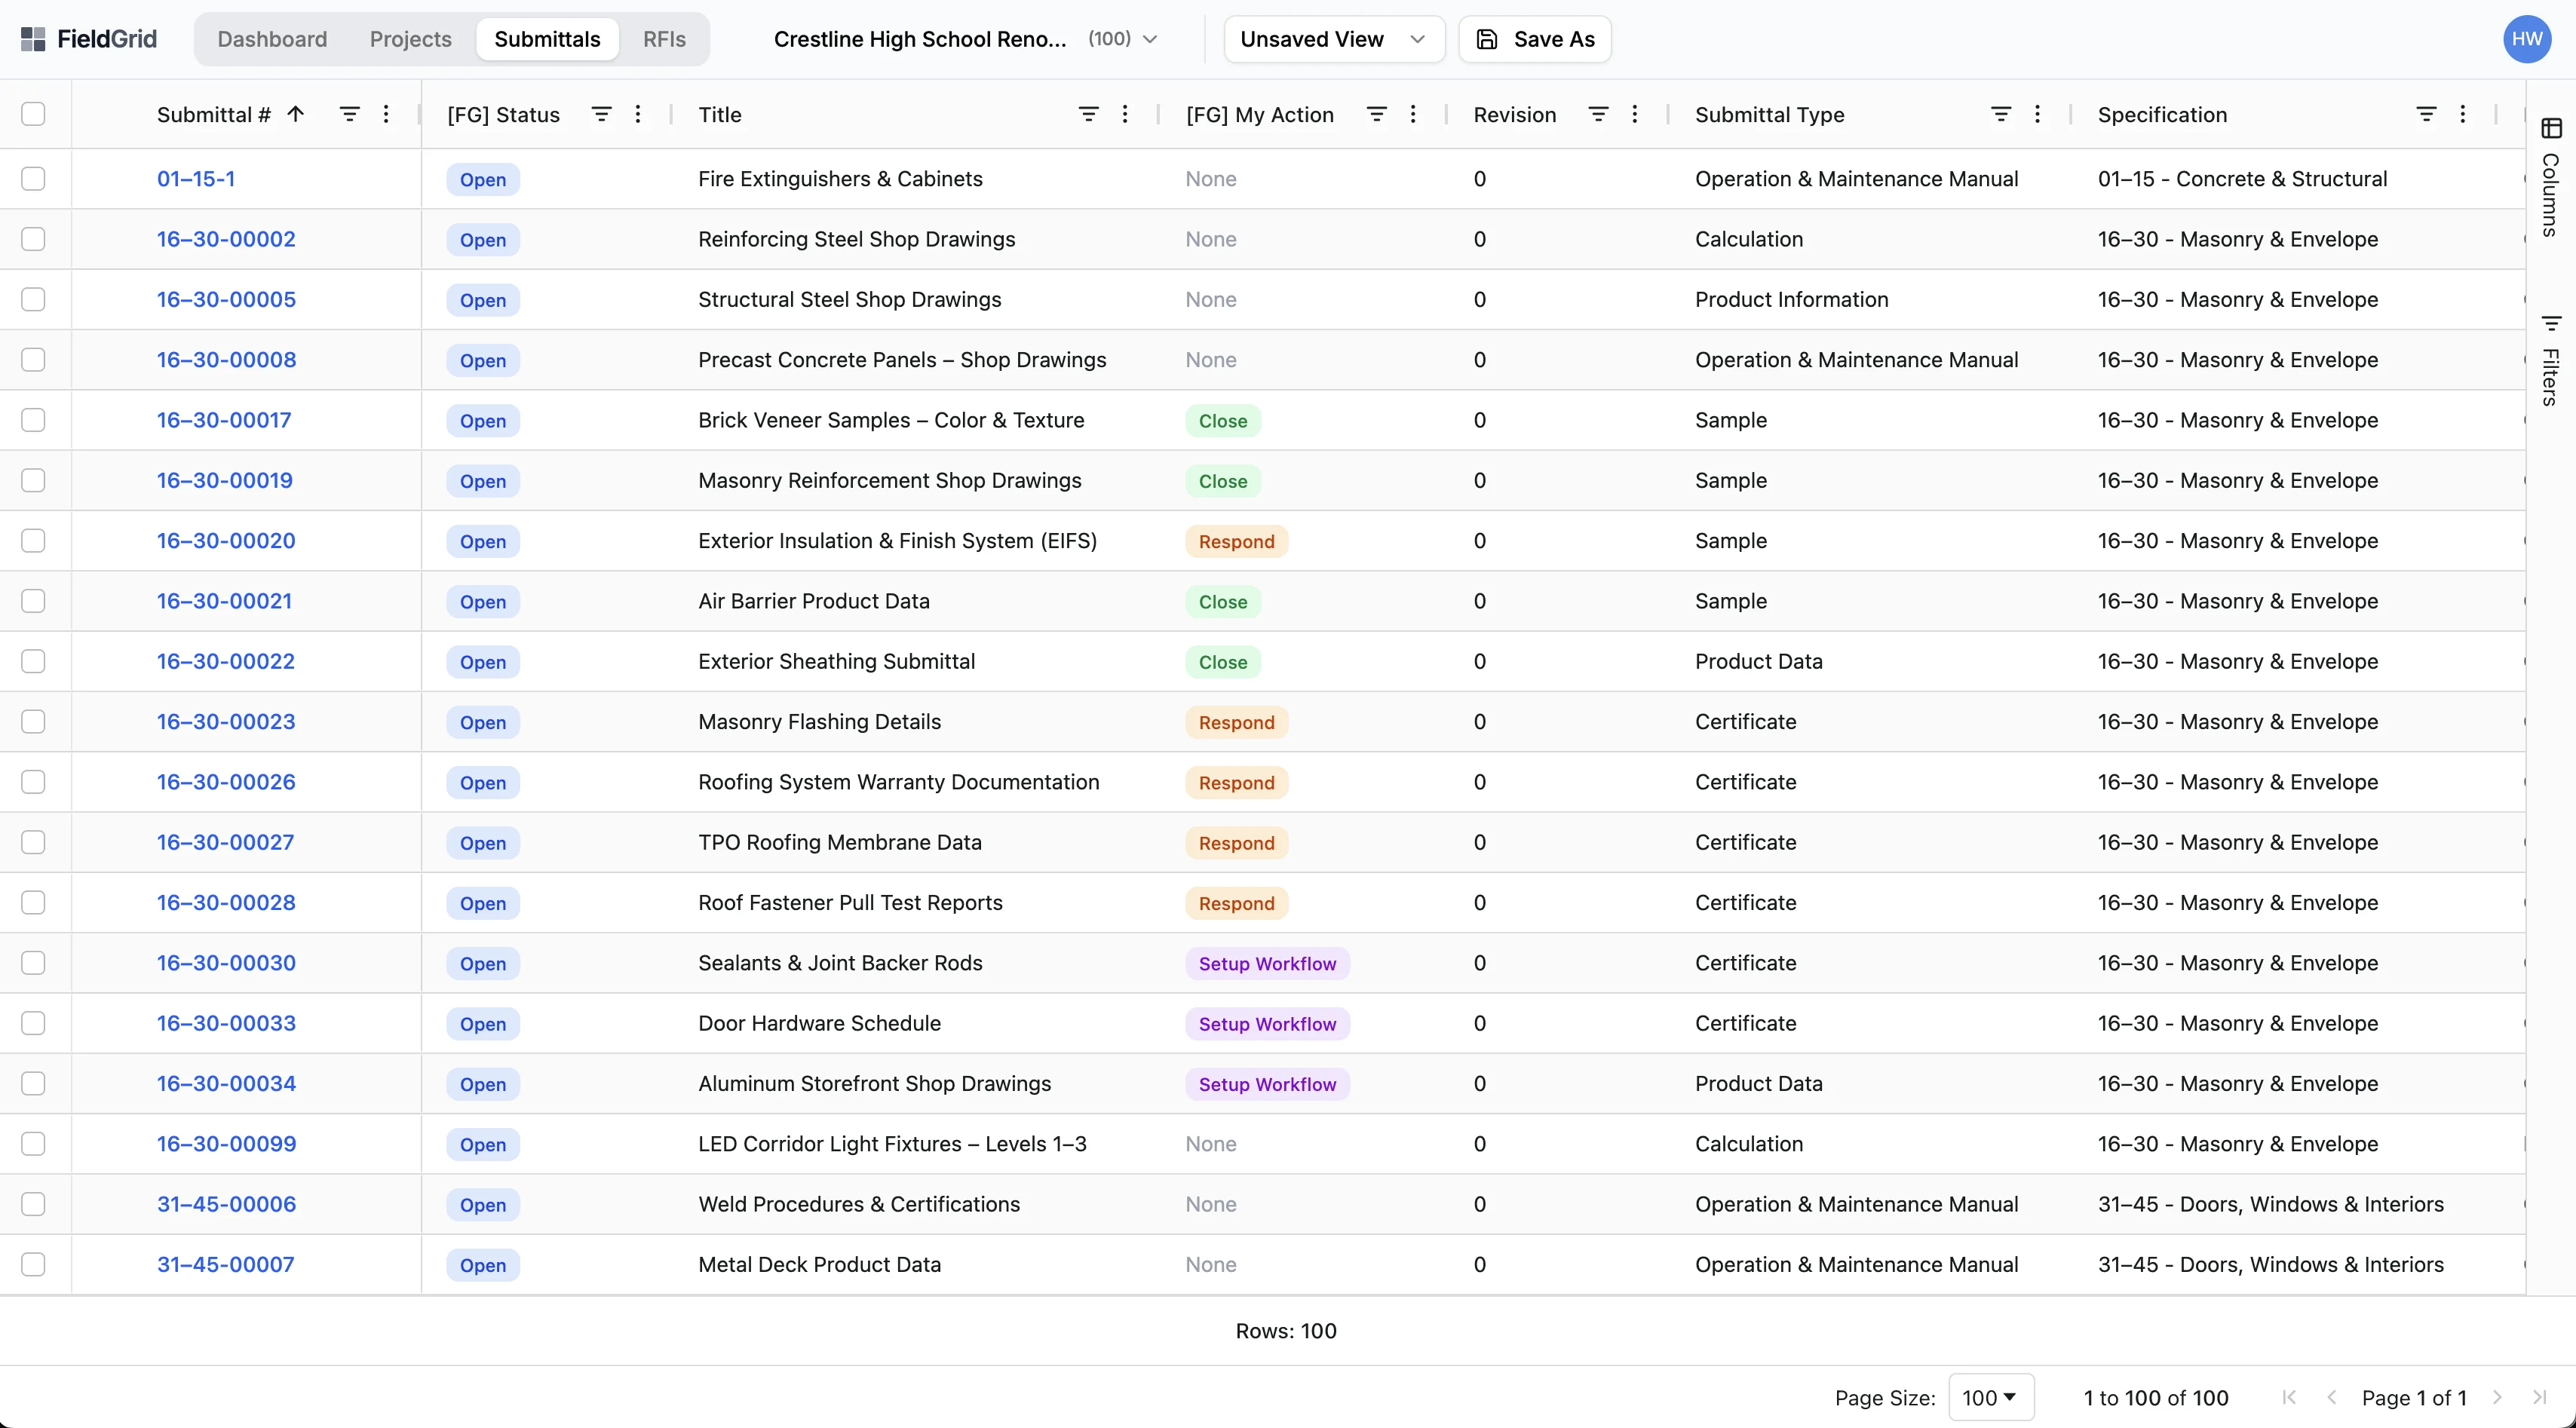
Viewing Submittals & RFIs
- Sort columns — Click any column header to sort
- Resize columns — Drag column borders to adjust width
- Show/hide columns — Use the column selector in the toolbar
Filtering
- Quick filters — Use the filter bar to narrow results
- Search — Type in the search box to find specific Submittals or RFIs
- Save filters — Create saved filter sets for common views
Taking action
- View details — Click a Submittal or RFI to see full details
- Respond to workflow — Submit approvals or rejections
- Bulk edit — Select multiple items to edit at once
Next steps
Now that you're set up, explore these guides to get the most out of Sandspit:
- Submittal & RFI Management — Deep dive into viewing and managing Submittals and RFIs
- Advanced Filtering — Create powerful filter combinations
- Bulk Operations — Edit multiple items at once
- Approval Workflows — Respond to workflows efficiently
Have questions? Reach out to our support team at [email protected].